DIY: REMOVING ACRYLIC NAILS
We all know that the quickest way to achieve and maintain long, healthy looking nails is a trip to the nail salon. Acrylic nails do wonders to elongate and beautify the nails - however the hefty price tag of upkeep isn't so pretty.When my last installment of student finance came in, I was growing tired of my teeny tiny nail beds which mean my nails can't grow very long without splitting and breaking off.
In the past, I had always visited the conveyor-belt style nail places who drill at your poor nails with none other than illegal tools able to cut through the likes of pig fat (seriously - there's a documentary on it) where I usually leave with bloodied, damaged cuticles. To prevent such treatment, I took myself to a beauty salon where trained beauty therapy professionals use only hand held files to buff the nail down in preparation for an acrylic "sculptured" overlay.
These were a little more expensive than the other option, however I found that the damage caused to the nail was much less - so worth it!
Being a student, however, meant that I couldn't afford to get them filled in - so continually filed the ridges and edges down as they grew out to then put a fresh polish on top. This is fine, until the acrylic weakens slightly and you're left with cracks in the nail. With funds low, I took it upon myself to soak the acrylics off - MUCH safer and pain free than pulling and tugging them off which leads to high level damage and lets face it, bruised fingernails!
If you want to try this at home, be sure to have all the necessary items to care and nourish your nails afterwards. Nails generally take 3-6 months to grow out fully so be patient! You will need;
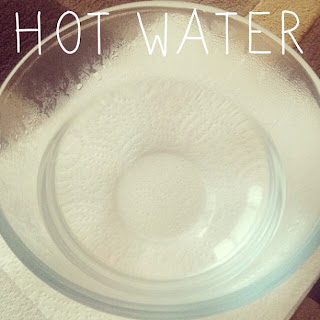
A medium sized bowl full of hot (as hot as you can handle!) water
Plenty of nail varnish remover (NOT acetone free)
A sandwich bag
Wooden or metal cuticle stick
Cuticle oil
Nail file
Nail buffer
Strengthening nail polish
The hot water will be used to "accelerate" the acetone in the nail varnish remover, making this process a lot quicker. Make sure this is at the maximum temperature you can handle, however you don't want to risk burning yourself!
Pour a little nail varnish remover, enough for all 5 fingers, into the sandwich bag.
 |
| Acrylic softening and lifting |
Put your hand into the bag, with just your fingertips and nails submerged in the remover. Then, place your hand into the bowl of hot water and soak for 5-10 minutes each time.The acetone in the nail varnish remover is used to "melt" the acrylic off the nail. This won't come off in one go, so the trick is to scrape each layer off with a cuticle stick. As the acetone gets to work, you will notice the edges of the acrylic lift and soften. Use this free edge to work the acrylic away from the nail.
Once you've scraped all the residue off, you may have some stubborn areas where the acrylic hasn't come off. Lightly file this over and smooth the area, buffing as you go. Then, file the overgrown nails into shape. Your nails at this point will be extremely brittle and parched, therefore great care needs to be taken when dealing with them. If you can bear it, cut the nail down short - this will save you a lot of grief with splitting etc. Each 'groove' you see in the nail will be a breaking point as it grows out, so the less of these the better.
Now the most important thing is to keep the cuticle moisturised. Without a healthy cuticle, there's no hope for your nails to grow back to an acceptable state! A rich oil preferable enriched with vitamin E is ideal, and this should be applied as soon as possible. The nails will be especially dry from soaking in the acetone.
Apply a strengthening nail polish over the nail. I use "Save The Nail" by Nails Inc. - this is made especially for nails damaged by acrylic and gel polishes. Then, if you prefer, apply your favorite nail polish over the top to keep them looking presentable. Ideally, keep them bare to allow oxygen to reach the nail and for them to harden slightly over time. The nail hasn't been exposed for a while so will need a little breathing space!
And then voila, you're done. Although they may not be too pretty at the moment, they're on the right track to recuperate and regain the strength they once had. Make sure you massage cuticle oil in daily, gently pushing the cuticle back to promote growth.
I hope this works as well for you as it did for me!


0 comments :
Post a Comment