Friday 24 May 2013

TUTORIAL:  HOW I DO MY BROWS! 

The one main question I'm asked is how I do my eyebrows. So here you go, here's a tutorial which hopefully gives you a better idea of how I achieve the look. I sometimes choose to go for a more natural brow, but at the moment this is what I'm feelin'! 

(NB The big chunk missing from the top of my arch is from a brow grooming and trimming related incident. I won't go into details...it was harrowing to say the least. Brow drama.)

1. Brush through brows using a spoolie to straighten out any stray hairs etc. 

2. 'Map' out your brows by firstly sculpting the underneath with a sharpened eyebrow pencil. 

3. Do the same for the top, using light strokes so the brow doesn't look too drawn on.  

4. Fill any gaps in lightly with the brow pencil. 

5. Using an angled brush and some brow powder or matte brown shadow, give the brows a thicker appearance by lightly brushing the colour through. I'm using an Ecotools angled brush here.

6. 'Carve' out the brow using concealer and a small brush. I use a Real Techniques detailer brush. 
The angles on the tip of this brush give great precision and the size is great for getting into those tricky areas!

7. Using a spoolie, brush the brow through. This will pick up any excess product and create a "diffused" effect. If you have any stray hairs, run a brow gel through to tidy it up. 


Thursday 23 May 2013

TUTORIAL: DARK & INTENSE "SLEPT IN' EYES


1. Apply an eyeshadow primer. Urban Decay Primer Potion is my favourite! 

2. Using a warm, medium brown shadow and a fluffy blending brush, apply the shadow all over the lid, brow bone and under the eye. 

3. Apply a deeper brown, adding more definition to the crease and to create a 'graduation' of colour. 

TIP: WHEN BLENDING, USE A LIGHT WINDSCREEN WIPER MOTION FOR A SEAMLESS LOOK

4. Pack on a deep maroon toned shadow. Blend this out and upwards. 


5. Keep building this colour up, moving on to a dark cranberry/burgundy shade and making sure to blend this on the outer 'V' of the lid and edge of the eye/underneath only. 

6. Add a tiny bit of black shadow on the outer 'V' of the eye to add definition and intensity. Also make sure you have a nice diffused effect all round the contours of the eye using one of the lighter shades and using the fluffy brush to disperse the colour. 


7. Using a gel liner, create a small cat eye flick. This doesn't have to be too neat as you're going to smudge it with your finger! Blend and smudge the wet liner with your finger to give it that "slept-in" look. 

8. Line the waterline and the tightline (under the top lashes) with an intense black khol pencil liner. Apply mascara liberally and add falsies if you wish! 

This look is all about the blending, and making sure the eyeshadow doesn't look 'cakey'. Achieve a velvety look by applying lightly, using small amounts of products and building up. Pair with dewy, glowing skin and a muted lip. I used my favourite eye brushes by Real Techniques (ALL time favourite brushes by my ALL time favourite Youtube guru's Pixiwoo!) and Crown Brushes. 

Wednesday 22 May 2013

HAUL: PALETTES (MAC DUPES!) & BRUSHES

Slowly but surely, I'm making 'investment' purchases and expanding my kit-to-be. I'm so excited to eventually start freelancing properly and making a proper living out of it. In the mean time, though, lets just drool over my latest buys. 

Lets start with what I'm most excited about - my Coastal Scents / BH Cosmetics palettes! I'd heard so much about these on Youtube and on other blogs and they really are such good value for money. 

I got the 10 Colour Professional Blush palette and the 28 Neutral Shadow palette and I'm SO happy with them! The colours are beautifully pigmented - may have smelt a little 'face-painty' when opened but that's just wholesale I guess - and have great payoff. Perfectly blendable shades and haven't broke me out at all. BARGAIN! 


The blush palette contains both warm and cool toned blushes which will suit a wide variety of different skin tones. 
Top Row: 
Matte medium brown with a hint of peach. 
Very light satin finish warm pink with a hint of peach.
Very light cool toned frosty purple-pink colour. 
Medium peachy pink colour with a satin finish.
Light brown with hints of mauve with satin finish.

Bottom Row:
Bubblegum satin pink colour.
Matte warm rose with brown undertones.
Bright tangerine/peach colour with silvery sheen.
Matte medium fuschia - not overly bright, just enough.
Warm satin brown with very strong peach undertones.


I'm not going to go and name all the shades in the 28 Palette, you can see for yourselves that there's a great range of colours in there! What I have done though is show you the MAC dupes to be found in here. They're not all spot on, but for the price, they're a pretty good match!


I also bought another fluffy blending brush which was £6.95 - you can see it in the first picture! I got all these from 'Beautystore4u-UK' on Ebay. They have some great deals! The blush palette was £16.95 and the eyeshadow  pallete was £23.59. 


Then, I went on over to Crown Brushes and bought three new toys to play with! I got the C405 Angle Contour Blush - £6.90, the C438 Pro Deluxe Liner - £2.66 and the C455 Flat Blender - £4.16. They all came in plastic film, and sanitised. The bristles were so much softer than I expected seeing as they were so reasonably priced and they work beautifully - rumour has it these guys supply MAC with the good stuff!

I would highly recommend all of these products, I took the risk of paying a little less for all of it but luckily it paid off! Very pleased and really excited to start playing with all of it - my housemates are my guinea pigs!


TUTORIAL: SOFT BROWN SMOKE WITH DRAMATIC LINER 


I haven't done a tutorial in a while so I thought I'd post a quick one for you! As long as you've got the right tools you can create a really soft yet dramatic smokey eye with just a few products. 

A staple tool for blending is a fluffy brush, and I get my cheap yet high quality brushes at Crown Brushes. They're amazing value, and so worth it. The brush I used in this tutorial, the "Pro Blending Fluff" can be found here.


 1. Start off by applying a light, pearlescent shimmer shade all over the lid, concentrating on the center. Bring up toward the brow slightly. I used "Virgin" from the Naked Palette by Urban Decay. 


2. Next, apply a matte, buff nude shade above the crease of the eye, blending thoroughly. 


3. Begin to create a more defined crease now by applying a warmer, darker brown just above and into the crease, again blending (and more blending!) to make sure there are no harsh lines and the colours 'melt' together.

4. Start to really smoke up the eye with a deep brown shade, working the colour into the 'outer-v' of the eyelid, bringing some of the residual shadow on the lower lash line. 


5. Create a thick, dramatic cat eye flick using your favourite liquid or gel liner. I used MAC Fluidline in Blacktrack and a fine liner brush. Make sure this is a true, rich black which really brings the look together. 

6. Line the waterline with a white or nude pencil, this opens the eye and makes it appear brighter. I prefer to use a nude liner simply because this is a little more natural and less harsh. 

7. Apply a generous amount of mascara to add drama - I find many thin coats is better than one thick one - to the upper and lower lashes. 
8. If you want to go that extra step further, add some falsies! This is a much less aggravating process if you use tweezers, and let the glue go slightly tacky before applying so the lashes don't 'slide' around the eye. 

Pair this with dewy, bronzed skin and a glossy nude lip and you're good to go! On my face I'm wearing Revlon Colourstay Foundation Oily/Combination, Hoola Bronzer by Benefit, and a mauve-toned shimmery blush from my 10 Blush Palette by BH Cosmetics. On the lips I'm wearing MAC Cremesheen Lipstick in Shy Girl. 


Monday 20 May 2013

DIY: REMOVING ACRYLIC NAILS 


We all know that the quickest way to achieve and maintain long, healthy looking nails is a trip to the nail salon. Acrylic nails do wonders to elongate and beautify the nails - however the hefty price tag of upkeep isn't so pretty.When my last installment of student finance came in, I was growing tired of my teeny tiny nail beds which mean my nails can't grow very long without splitting and breaking off.

In the past, I had always visited the conveyor-belt style nail places who drill at your poor nails with none other than illegal tools able to cut through the likes of pig fat (seriously - there's a documentary on it) where I usually leave with bloodied, damaged cuticles. To prevent such treatment, I took myself to a beauty salon where trained beauty therapy professionals use only hand held files to buff the nail down in preparation for an acrylic "sculptured" overlay. 

These were a little more expensive than the other option, however I found that the damage caused to the nail was much less - so worth it! 

Being a student, however, meant that I couldn't afford to get them filled in - so continually filed the ridges and edges down as they grew out to then put a fresh polish on top. This is fine, until the acrylic weakens slightly and you're left with cracks in the nail. With funds low, I took it upon myself to soak the acrylics off - MUCH safer and pain free than pulling and tugging them off which leads to high level damage and lets face it, bruised fingernails! 

If you want to try this at home, be sure to have all the necessary items to care and nourish your nails afterwards. Nails generally take 3-6 months to grow out fully so be patient! You will need;

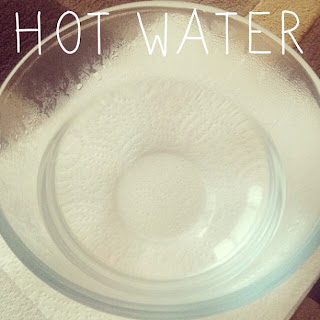
A medium sized bowl full of hot (as hot as you can handle!) water 
Plenty of nail varnish remover (NOT acetone free)
A sandwich bag
Wooden or metal cuticle stick
Cuticle oil
Nail file 
Nail buffer
Strengthening nail polish


The hot water will be used to "accelerate" the acetone in the nail varnish remover, making this process a lot quicker. Make sure this is at the maximum temperature you can handle, however you don't want to risk burning yourself!

Pour a little nail varnish remover, enough for all 5 fingers, into the sandwich bag.


Acrylic softening and lifting
Put your hand into the bag, with just your fingertips and nails submerged in the remover. Then, place your hand into the bowl of hot water and soak for 5-10 minutes each time.The acetone in the nail varnish remover is used to "melt" the acrylic off the nail. This won't come off in one go, so the trick is to scrape each layer off with a cuticle stick. As the acetone gets to work, you will notice the edges of the acrylic lift and soften. Use this free edge to work the acrylic away from the nail. 


Once you've scraped all the residue off, you may have some stubborn areas where the acrylic hasn't come off. Lightly file this over and smooth the area, buffing as you go. Then, file the overgrown nails into shape. Your nails at this point will be extremely brittle and parched, therefore great care needs to be taken when dealing with them. If you can bear it, cut the nail down short - this will save you a lot of grief with splitting etc. Each 'groove' you see in the nail will be a breaking point as it grows out, so the less of these the better. 


Now the most important thing is to keep the cuticle moisturised. Without a healthy cuticle, there's no hope for your nails to grow back to an acceptable state! A rich oil preferable enriched with vitamin E is ideal, and this should be applied as soon as possible. The nails will be especially dry from soaking in the acetone.


Apply a strengthening nail polish over the nail. I use "Save The Nail" by Nails Inc. - this is made especially for nails damaged by acrylic and gel polishes. Then, if you prefer, apply your favorite nail polish over the top to keep them looking presentable. Ideally, keep them bare to allow oxygen to reach the nail and for them to harden slightly over time. The nail hasn't been exposed for a while so will need a little breathing space!

And then voila, you're done. Although they may not be too pretty at the moment, they're on the right track to recuperate and regain the strength they once had. Make sure you massage cuticle oil in daily, gently pushing the cuticle back to promote growth. 


I hope this works as well for you as it did for me! 


MAKEOVER MONDAY: SOFT SMOKEY LINER

There's nothing I love more than a good makeover - and luckily I live with two other girls who I can frequently lay my hands on. This post includes the beautiful Emma, who asked for something soft, understated and sultry. 


This is really simple and effective; sweep a muted neutral tone all over the lid to give the crease some definition. Then, using either a khol or gel eyeliner on an angled brush, create a small cat-eye flick. Whilst the product is still wet, 'pull' the product upwards, creating a smudged, smokey effect. Blend this out with a fluffy blending brush. A few coats of mascara and you're done! The smoked liner really makes the lashes look thicker. 

I also gave Emma a slight 'brow overhaul' - She complained of slightly sparse, uneven brows and asked me to work some magic on them. So I groomed to my hearts content and created a fuller shape to what she normally has, using an eyebrow pencil to carve and sculpt a fuller, more even shape and then created the illusion of thickness with an eyeshadow and an angled brush. The trick is to 'mimic' the hair growth, using small light strokes instead of just drawing them on. 

 
On the face I just used MAC Studiofix Fluid foundation, Maybelline Fit Me concealer and MAC Prep and Prime translucent powder to set. Benefit's 'Hoola' bronzer was perfect to contour on Emma's fair skin, whilst warming the face up slightly. I then used a light dusting of Benefit's 'Bella Bamba' blush on the apples of the cheeks. This contains a really fine shimmer which gives the skin a gorgeous healthy glow. To finish, I applied a mix of MAC Satin lipstick in 'Myth' and Laura Mercier lipstick in 'Tea Rose'. 


Tuesday 14 May 2013

WISHLIST


It's that time again. Exams are looming - and what better way to procrastinate than do a bit of online window-shopping! I've been wanting to post more fashion-related posts recently so I thought a little pre summer wishlist would do the job to begin with! 

I'm saving every penny I can for travelling this summer (excluding a Glossybox subscription..that doesn't count. Shh.) and so browsing through online stores is even more painful than usual. These are a few items that have caught my eye and I wish could be hung up in my wardrobe - however exploring Europe this summer has taken precedence. A girl can dream, eh? 

Topshop - £52.00
Stepped Hem Bodycon Dress


Hexagon Strappy Slip Dress
Topshop - £75.00


60's Lace Panel Shift Dress
Topshop - £46.00


Pocket Quilt Skirt
Topshop - £35.00
Office City Bag - Zara - £49.99

Ankle Strap Sandles - Zara - £39.99


Friday 10 May 2013


EMILY'S BIRTHDAY MAKEOVER 

Tonight I headed over across town (not that difficult in the small city of Liverpool) to do the birthday girl's makeup for her big night out.

I was given free reign over her beautiful lil' face and created a sultry, smokey eyed look with a decent pair of falsies, of course.

What a stunner!

Close up: For a night out , soft and smokey eyes are a must.


I love freelancing and making girls feel fabulous, I'm sure from Em's big grin you can tell she was more than pleased with the results!

I used MAC Studio Fix Fluid in NC30 for a flawless yet breathable base, applied with a Real Techniques Buffing Brush for an airbrushed finish. Bare Minerals all over face colour in "Warmth" gave a subtle bronzed look whilst contouring. Then I used an array of shades from Urban Decay Naked Palette for the eyes (the gorgeous iridescent shade in the inner corners is 'Virgin' - one of my favourites for highlighting the tear duct and brow bone) with MAC Blacktrack gel liner pulled upward for a smokey cat eye flick. For the lips, a small dab of MAC Cremesheen in 'Shy Girl' mixed with Illamasqua sheer gloss in 'Artifice'. 


MY NEWLY ORGANISED MAKE-UP COLLECTION

Make up geeks unite; I have a very exciting update for everybody. You're all gonna want to see this.

I went and got an acrylic make-up storage unit didn't I. I also utilized some pretty boxes I just had, you know, lying around - and oh mama does it look fab.

Not enough space on my chest of drawers for my ever expanding collection. 1st world problems.

I probably sound like a complete nut job to most but being able to organise the stupid (yet obviously necessary) amount of cosmetics I have was heaven sent - and extremely pleasing to the eye to someone like me: the eternal perfectionist.

You can find cheap alternatives to the Muji clear acrylic organisers (one day they will be mine) on Amazon or Ebay and boy are they worth it. I intend to buy more of these - I'm even going to stack the drawers. Ohh yeah. I think these are really nice even when you haven't got much to put in them - I like the idea that everything has it's place in them.

So yeah...this was something I genuinely thought needed it's own post. I think I need to re-evaluate my life.


Thursday 9 May 2013

INSTAGRAM UPDATES:FAVOURITE APRIL GLOSSYBOX ITEM

So last month I took the plunge and subscribed to Glossybox, the monthly beauty subscription that I have been drooling over for months. It's a £10 per month 5-piece wonder, and the best part is that you don't know what products you're going to get each time. Good lord the suspense when unwrapping that beauty. 

April 2013 presented me with a gorgeous floral printed box designed by Pearl Lowe, which I've now conveniently transformed into storage for my ever growing make-up collection. As it was my first box, I didn't know what to expect. I recieved Sunsence daily face SPF50, a tinted sun-screen for face, NIP+FAB dry skin fix body butter in "Pistachio Sundae", Model Co cheek + lip tint in "Rosy Red", Yves Rocher France "So Elixir Purple" eau de parfum, and most importantly, a full size Essie nail lacquer in "Nice is Nice". This nail polish makes up for the other rather lacklustre products I received. You win some, you lose some.


My beautiful little Glossybox
I have to say, the Essie polish is one of my favourite products in a long time. Perfect for spring/summer months, "Nice is Nice" is a pretty, girly and slightly grey-toned lilac with a super glossy finish. This didn't chip, dull or 'bubble' like other cheaper branded polishes do, I couldn't recommend the brand or the shade enough! Definitely worth it for what I think it retails at around £11 (I got it for free..kind of. Feels like it.) Subscribe for your own Glossybox here.


INSTAGRAM UPDATES: FACE OF THE DAY

Subtle double winged liner using liquid eyeliner and eyeshadow


Using my beloved Collection 2000 felt tip liner and just an old Revlon brown shadow I recreated a double winged liner look seen on the likes of Kim K, but a lot more subtle and wearable for day-time wear. This look has so much versatility and potential for daring evening looks. The double wing really elongates an already sultry cat-eye flick, and using more subtle muted colours means an almost undetectable twist to your everyday make-up. I love it.


Kim Kardashian's dramatic double-wing eyeliner